ready for another round of quickie crafting?
how about a SUPER cute belt!?
not only is this a quick craft BUT it is also great camo…
people will say cute belt and won’t think twice about your little ol’ muffin top. 🙂

The great part is that you can make as many cute
belts as you want…one for every single
outfit if you really want. You can get the materials
needed in any color and combo you could think of.
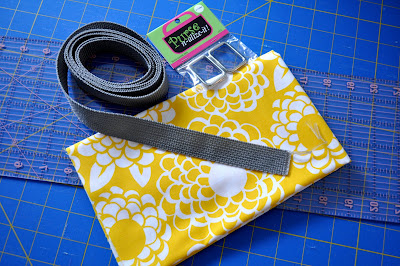
Here is what you need:
1in wide webbing (I found mine in the ribbon section at Joanns)
length of the webbing should be your waist size plus 10 in inches or so.
2 d-rings or rectangular ones like I have (I found these in the purse handle section
fabric of choice
sewing machine (or MAYBE iron on adhesive?)
having a cutting mat and guide (shown in photo) will help a lot

First, wrap the webbing around your waist where you wear your belt.
Add about 8-10 inches to that and cut and seal the ends with a lighter.
Like if your waist is 28 cut 38 inches of webbing.
Second, thread the webbing through your
d-rings and sew the end down as shown.
I went over it several times to ensure strength.

Third, cut your fabric 2 1/4 wide by your waist measurement PLUS one inch.
In my 28 inch example I would cut the fabric 2 1/4 by 29 inches.
You could make a patchy belt..that would be cute. 🙂

Fourth, fold in half and iron with 1/4 guide…then turn it right side out.

Fifth, once you have turned your little
fabric tube right side out…iron it with
the seam in the middle of the back
…as shown…tuck in the ends a half inch or so as well.

Sixth, center your fabric onto your webbing…pin if you would like…be sure to cover your previous stitching with your fabric AND allow room for your sewing foot to get in there.
Sew all around the sides…using 1/4 guide.

Then go flaunt your new sass and leave them saying…what muffin top?
Leave questions in the comments and I will answer them there. 🙂
